Installing a single GT-40 fuel pump in a Mercury Marauder
I will be installing a single turbo kit on the marauder. As part of the fuel system upgrade I have chosen to use a stock GT-40 pump out of the ford supercar. Test have shown this pump to flow from 430 lph at 40 psi to 290 lph at 90 psi at 12.6 volts. Based on the modest boost I will be running (6-9 psi) I hope this pump with 60 lb injectors will supply sufficient fuel for my power levels (400 –460 rwhp). The dyno will be at least a month away, but I will report the results. Right up front I would like to thank the MM.net members who gave me physical, technical and moral assistance!!
Ford part numbers are 4G7Z-9A407-CA or pfb81. Cost about $80.
The GT- 40 pump comes with a different fuel line (longer and with a 90) and separate connectors. You will need to have two shielded connectors to fit the GT-40 tabs and a very small stainless hose clamp for the fuel line. You can pick your sizes once the GT-40 pump arrives. I fully expected to have to drop the tank to install this pump, but after some teleconferencing with Shakes26 I learned that Carfixer replaces the stock pumps with the tank in place and the frame on a lift. I used jackstands, and while it was a PITA, it is doable. Ensure you have less then 1/2 a tank of fuel . A ¼ or less is best.
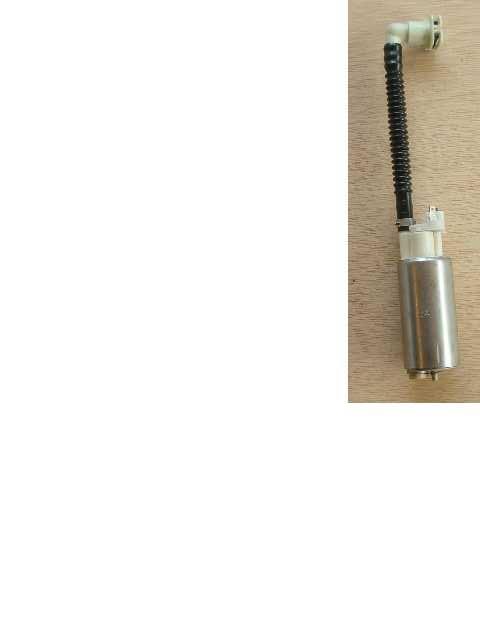
GT-40 PUMP
- Remove the plastic basket from the GT-40 pump. Remove the fuel line from the GT-40 pump by cutting the metal band off.
2. Remove the negative lead on the battery
3. Place the rear of the car on Jackstands
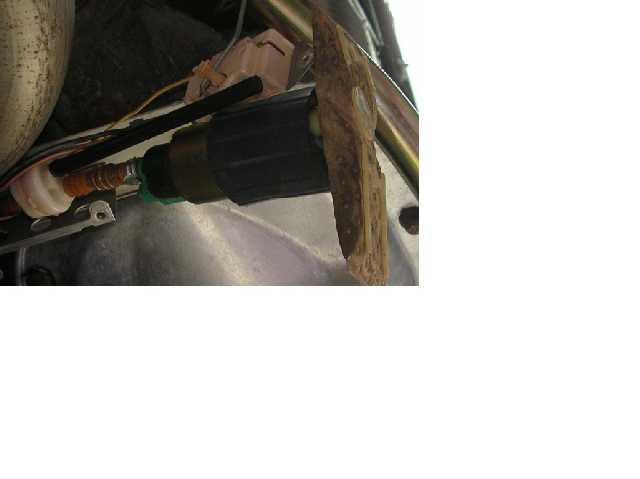
4. The fuel pump assembly is located on the front of the fuel tank just above the pumpkin. With the axle hanging it is possible to remove it with the tank in place.
5. Disconnect the power to the fuel pump. (note: if you want to disconnect the fuel line and can find the disconnect for the fuel level sender then you will be able to remove the entire assembly.)
6. Remove the six bolts holding the assembly in place. I believe they are 8 or 10 mm. You will need a long (> 6" extension to reach past the axle.)
7. I had to remove the hanger on the passenger side MEG tip to allow it to move a few inches to get the assembly out.
8. Wiggle the cover to loosen the assembly. Gently remove the assembly taking great care to not bend or damage the lever for the fuel sender float. I chose to leave everything hanging.
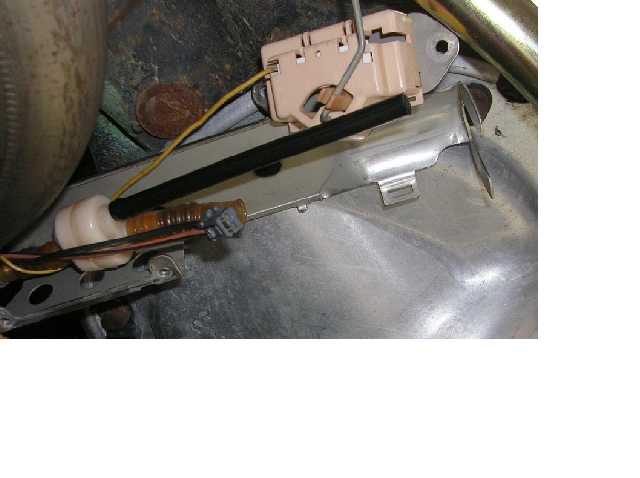
STOCK PUMP ASSEMBLY WITH FUEL SENDER MOVED
9. Cut the tie wrap from around the assembly.
10. Remove the fuel sending relay for access to the fuel line/connector.
11. Remove the screw from the band holding the fuel pump on and remove the band.
12. Disconnect the electrical plug from the fuel pump. Cut the metal band on the fuel line very carefully so as not to damage the stock line. Remove the pump by pulling it from the stock line.
STOCK PUMP REMOVED - note the electrical plug
13. Remove the sock and remove the rubber "basket" from the stock pump. You will reuse the basket on the GT pump. The GT pump is slightly smaller in diameter. I used a tie wrap to attach the old basket to the new pump.
Stock (left) GT-40 (right)
14. Cut the stock connector from the existing wires, as close to the connector as possible. Attach a shielded connector to each wire.
15. With the new sock and old basket on the GT-40 pump, reinstall it on the existing fuel line using a stainless steel hose clamp.
16. Connect the wires. One GT-40 terminal is marked positive. The wires I had at my pump were BLACK and Pink with brown or yellow stripe. It was hard to tell after being discolored by the fuel. My BLACK wire was the negative and the other was the positive.
GT-40 pump installed. Note the new electrical connectors.
17. Reinstall the bracket and any tie wraps.
18. Reinstall the fuel sender.
19.Carefully insert the pump back in the tank.
20. Tighten down the cover assembly.
21. Reattach the MEG hanger.
22. Connect the battery and start the car.
23. CONGRATULATIONS- you now have a supercar fuel pump in your marauder!


 Reply With Quote