JACook:
I know others have revived their EATCs by swapping in the vacuum solenoid assembly from other Ford
products, but I decided to dig a bit deeper. The problem was an o-ring inside one of the EATC solenoids.
Total cost to fix the problem- 'Bout 25 cents, and a couple hours of my time.
Replacing the o-rings requires disassembly of the solenoids, but that's really not that hard to do, if one
has reasonably good mechanical aptitude. But first, make sure they hold vacuum when not energized.
Connect a hose to the center vacuum port (where the black tube was connected) and suck it.
")
It should hold vacuum. If it doesn't, the following fix probably isn't for you.
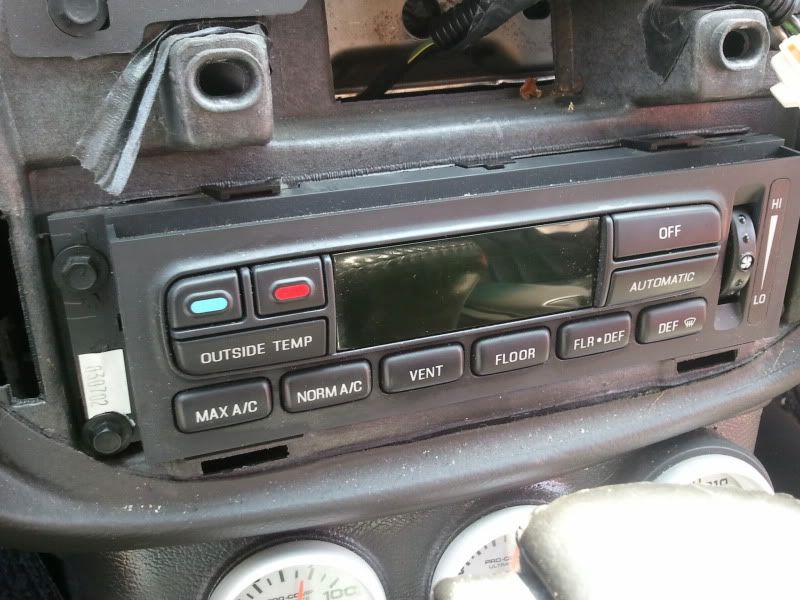
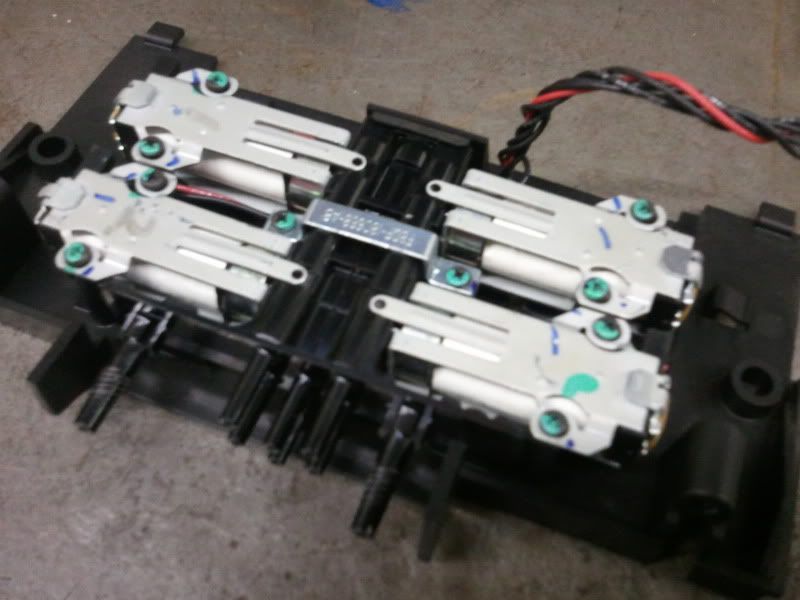
The solenoid assembly comes off the EATC module by unscrewing the two T-20 Torx screws on the
back side of the module. Pivot the rear of the assembly up, and disengage the tabs at the front of
the module. Disconnect the solenoid connector.
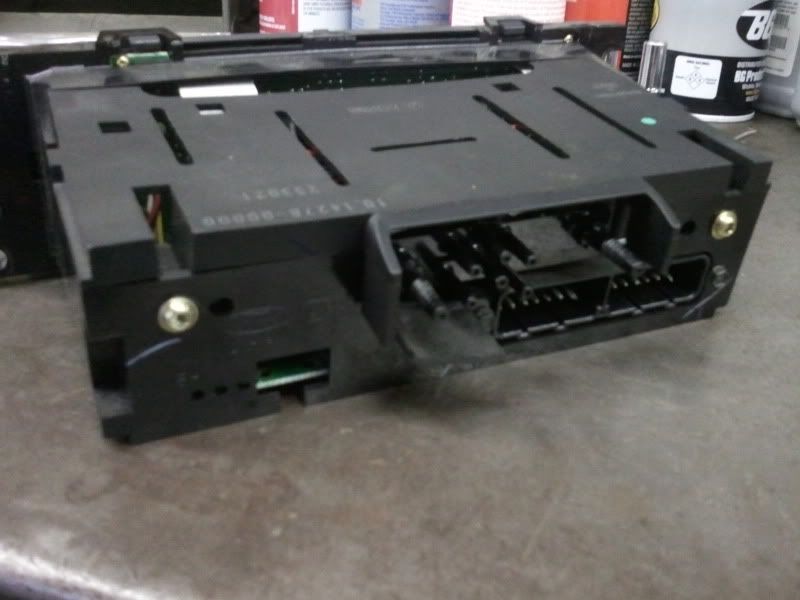
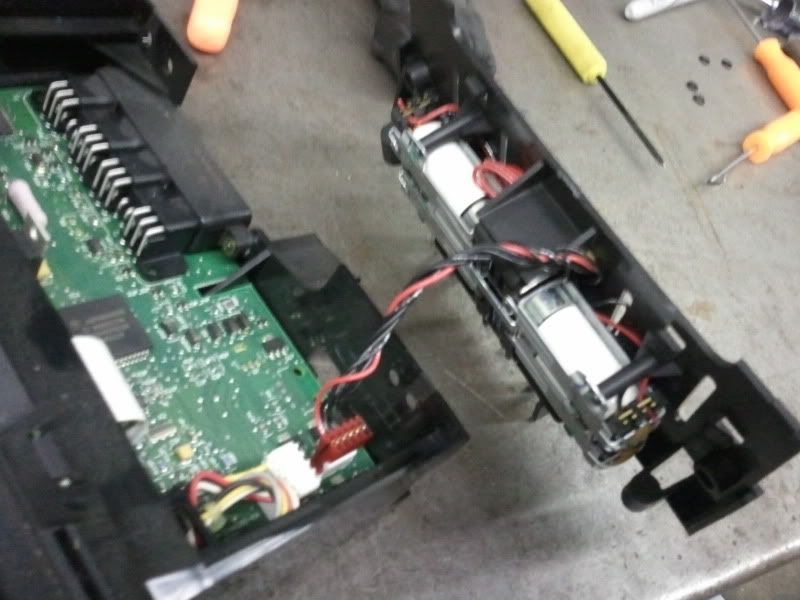
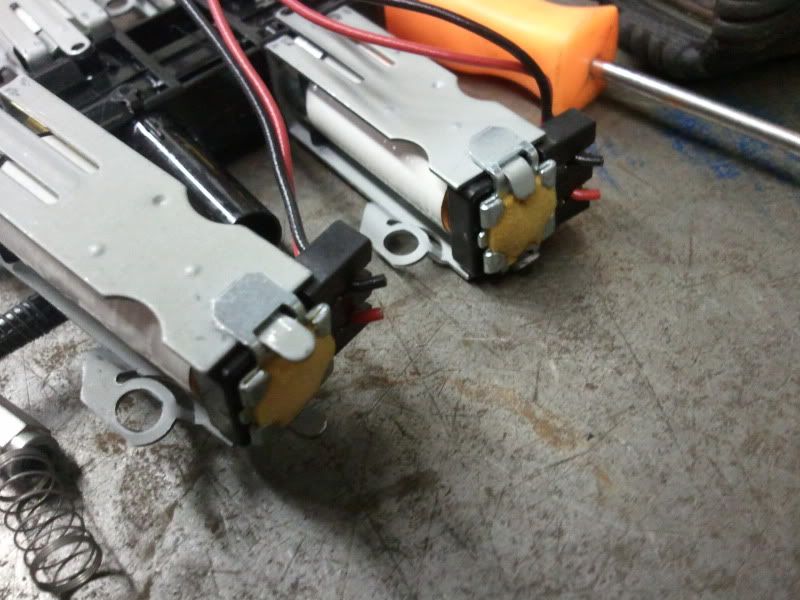
Lay the solenoid assembly on it's back, and remove the 10 screws holding the solenoids and plenum
strap to the plastic frame. At the wiring end of each solenoid, you'll see two metal tabs folded over,
that hold the solenoid coil and armature to the solenoid frame. Straighten these tabs and then carefully
pull out the armature, while watching you don't lose the spring or plunger that are inside. Note the
o-ring on the armature. That's what we're after.
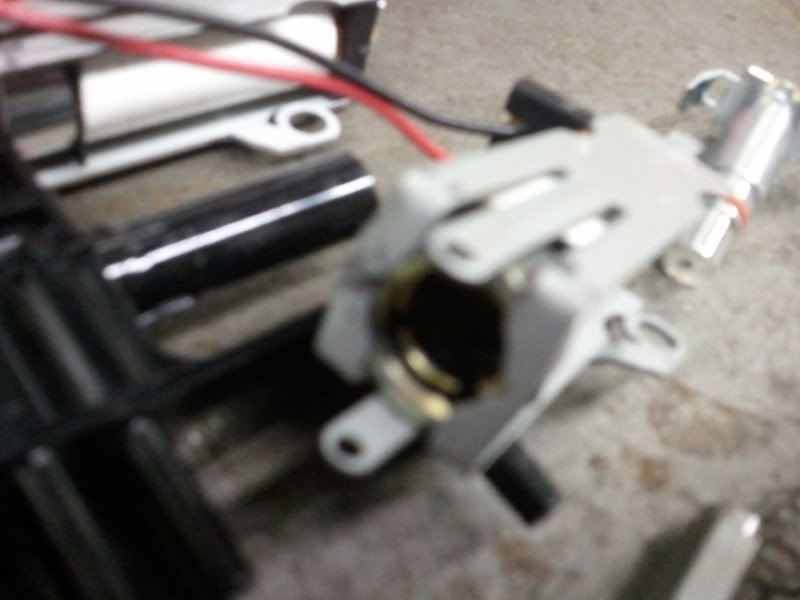
Next, slide the coil off the end of the plenum tube, and then pinch the ends of the solenoid frame
together to release it from the plenum. Once the solenoid is all apart, fit the armature back into the
end of the plenum tube to check that the o-ring has a good snug fit. If it does, clean the inside of
the tube, and reassemble the solenoid. You can replace the o-ring if you like, but if it fits well, there's
no need.
Make sure you pay attention to the screw flanges on the solenoid frame. Pinch the end of the frame
together to fit it back onto the plenum. The spacer that goes at the plenum end of the solenoid
has the inside diameter undercut, and four grooves. The undercut end goes toward the plenum, and
you'll see four ribs at the base of the plenum tube that mate with the four grooves in the spacer.
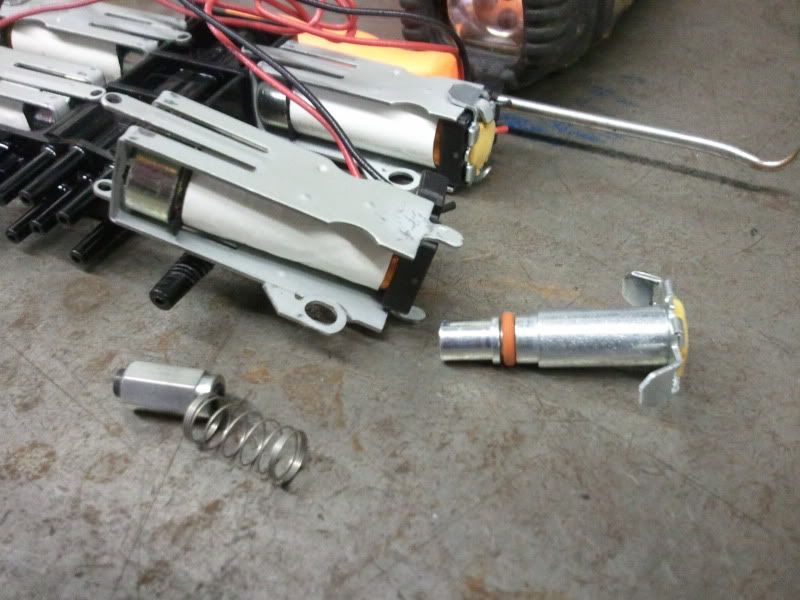
The armature slides back on next, followed by the plunger, and then the spring. (The flat end of
the plunger goes into the hole first, if you missed how it came out.) Use a bit of dielectric grease on
the o-ring, (I used Nylog) but do not use any oil or anything on the plunger. Make sure the tip of the
armature where the plunger seals against it, is clean and shiny. Don't get any dielectric grease on the
tip of the armature. Clean and dry is what you want here. Slide the armature back into the end of the
solenoid, and while pressing everything back together, fold the metal tabs back over.
Repeat this for each of the four solenoids. On mine, the one that was leaking was for the floor vent
door (red hose). It was obvious when I got to that one. The armature came out much easier than the
others, and when I test-fitted the armature back into the plenum tube,
it was a much looser fit.


 Reply With Quote


